Ellie Edmonds, garden apprentice
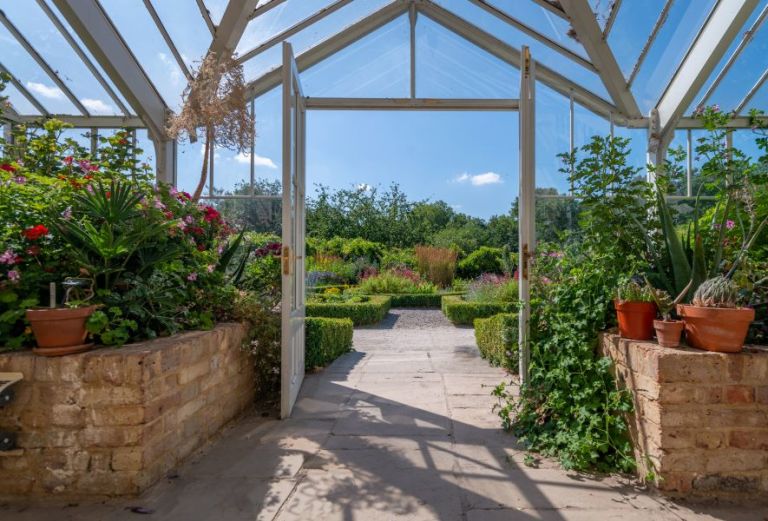
Building on the success of the Compton border, the gardeners are keen to introduce more historic Compton plants into the garden. The central vinery has been overdue for a refurbishment for some time, as gigantic pelargoniums stretch for the ceiling and block out the light. In preparation for the change I took cuttings from all our pelargonium specimens to propagate, building stocks with some to sell on the barrow. Minty P. tomentosum and citrusy P. ‘Charity’ were especially pleasant to work with and filled the vinery with scent.
We then removed the remainder of the plants which had become woody and overgrown – they will be recycled back into compost for use in the garden. We potted on and kept several aloes (applying the juice from broken leaves to wrinkles along the way), a Trachycarpu wagnerianus, a Dendrobium sp. orchid and a baby citrus plant that we think may have been self-seeded from a discarded fruit!
We have been growing a range of Compton plants from cuttings to be introduced into the vinery including Lavandula denticulata, (named after its unusual, unfolded leaves resembling teeth) Argyranthemum frutescens and aeoniums. We will also reintroduce some historic pelargoniums including the ‘gouty geranium’ P. gibbosum which has unique swollen stems resembling the medical condition.
Inspired by Chelsea Physic Garden I have created some ‘Kokedama’ to hang in the vinery. These Japanese moss balls can contain dwarf plants or bulbs and are similar to the practice of Bonsai. I chose miniature daffodils ‘Baby Moon’ although snowdrops are often used. I feel like it may take more practice to master the technique, as mine seem to resemble monster eggs rather than a ‘living work of art’.
The new vinery display will be completed in the next few weeks. Come and explore the new plantings.
Ellie’s pelargonium cutting method
If your Pelargoniums are looking a little wayward like ours, why not give this a go?
- Select a shoot with strong, young healthy growth
- Cut from the plant just above a leaf using sharp clean secateurs
- Trim the cutting to two nodes (where leaves join the stem) discard any buds or flowers
- Remove leaves until only one at the tip remains, trim the leaf if very large
- Push cutting into seed compost, water well and cover with cloche or clear plastic bag
- Don’t allow to dry out and repot when you see new leaf growth – your new plant is ready!